Installing Your Smart Door Lock With Lever
Smart Door Lock Lever Install Guide PDF
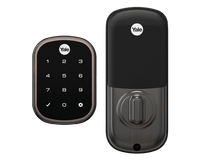
Your keyless Smart Door Lock with a lever lets you conveniently unlock and lock your door with a backlit touchscreen keypad, rather than having to carry around keys that can get lost.
You can also create entry codes for friends and family, and automate your lock with schedules and rules based on your home, life, and security system.
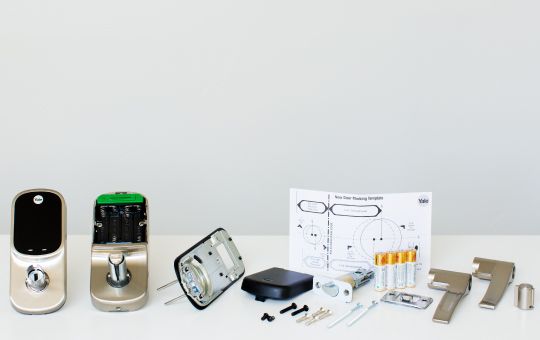
Installation parts
-
Your door lock, which includes:
- Exterior touchscreen keypad
- Interior lock
- Interior mounting plate
- Battery cover
- Deadlatch
- Strike plate
- 2 long through bolts
- 4 wood mounting screws
- 2 small machine screws
- 4 AA batteries
- A key-free cylinder
- Envelope with door checker and installation template
Tools you’ll need
- Phillips Screwdriver
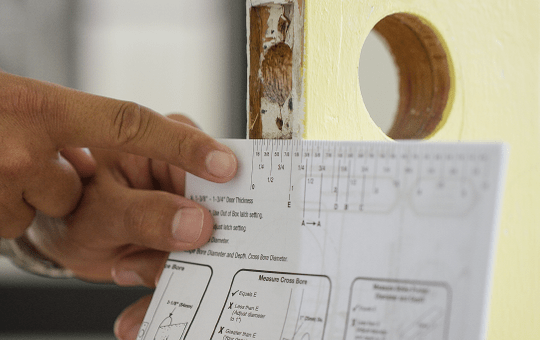
Checking door specs
The Smart Door Lock can go on any standard exterior or interior door that you wish to control, as long as the frame can support the lock.
The door should be no thicker than 2 inches. The Smart Door Locks we provide can support any door handle except 1-piece handle-and-deadbolt combinations.
Check the door installation template provided with your package, to make sure your door thickness, and the holes for the lock and deadlatch are the right measurements.
If you have any questions about the compatibility of your door, reach out to a virtual Smart Home Pro.
Determining door direction
Before removing your existing door lock, remember which side of the door your hinge is on, as that is the same way your lever handles will face.
If your door hinge is on the right, your lever handle will face right; if left, then it faces left.
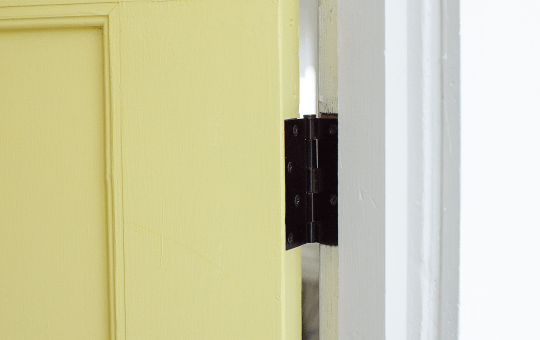
Also, check which way the curve on your existing latch should face, making sure the curve on the latch hits the strike plate first.

Installation instructions
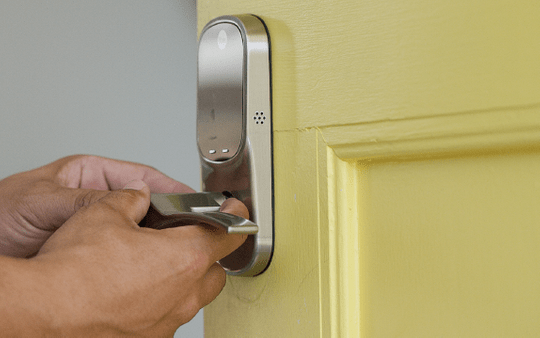
1. Carefully remove the old door lock from the door.
2. Remove the pre-programmed lock from your device box.
3. Install the deadlatch into the door, securing it with 2 wood screws. Make sure the latch is in the unlocked, horizontal position; that its up arrow is facing up; and that its center hole is in the middle of the door hole.
If necessary, you can elongate the deadlatch by pressing the black button on the bottom.
4. Attach the strike plate on the door frame, using the other 2 wood screws.
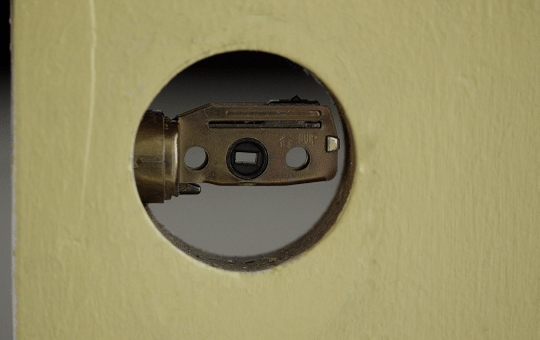
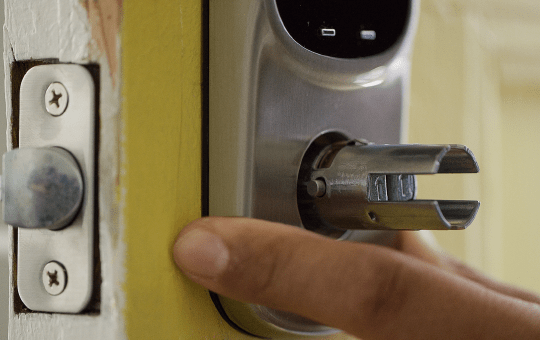
5. Before installing your touchscreen keypad to the outer part of your door, check that the tailpiece of your keypad has the “top” mark and arrow facing upwards.
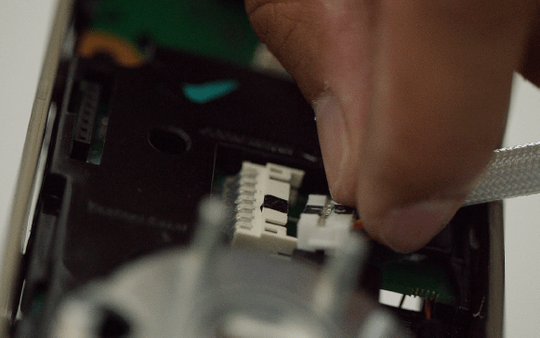
6. Slide the tailpiece into the hole at the center of the deadlatch, while sending the cable through the door hole, underneath the latch. Push the keypad into the place, flush against the door.
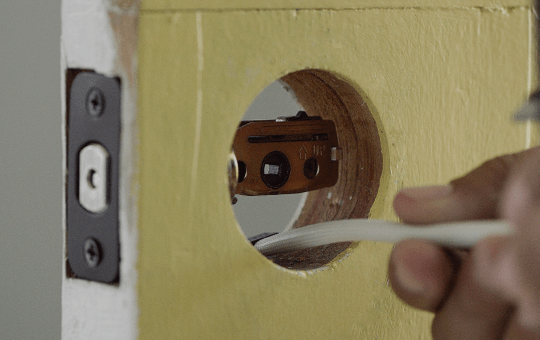
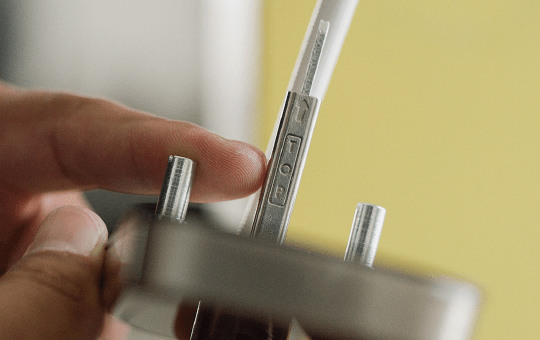
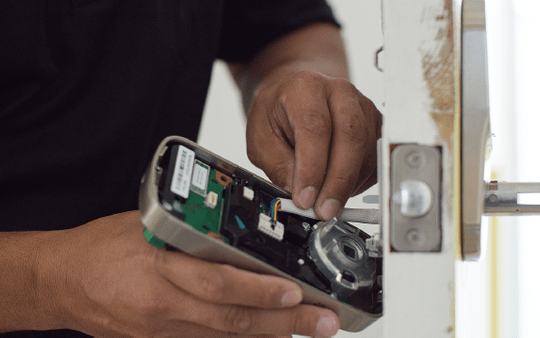
7. Take the mounting plate, and guide the cable through its hole, as you place the plate against the inside of the door. Make sure the cable is tucked into the slot in the mounting plate.
Secure the mounting plate on the interior side of the door frame with the 2 long bolts provided.
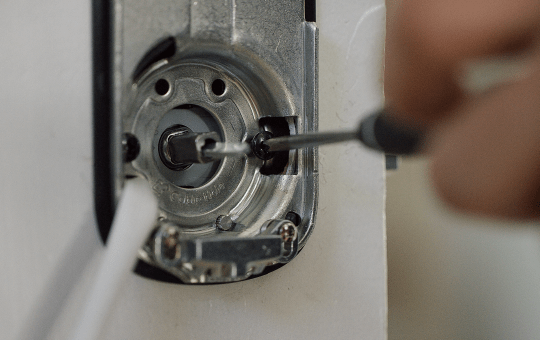
8. Remove the battery cover from your interior lock.
9. Connect the cable to the adaptor, located on the inside of the interior lock. Seat the cable under the cable hook on the inside of the lock.
10. Make sure the thumb turn is in the horizontal position, as you attach the interior lock to the mounting plate. Hook the bottom of the lock into place first, until you hear a click, then push the top of the lock into place.
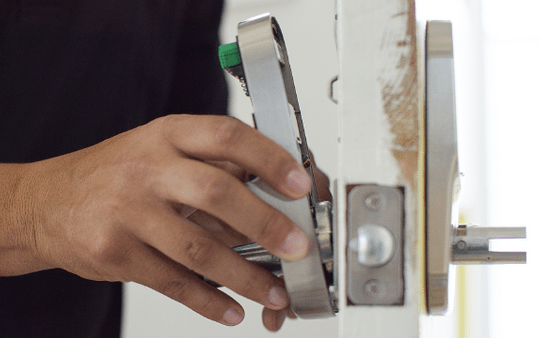
11. Secure it to the wall with 2 machine screws in the corners of the battery compartment.
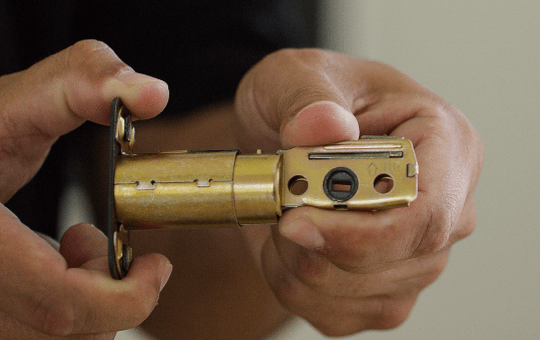
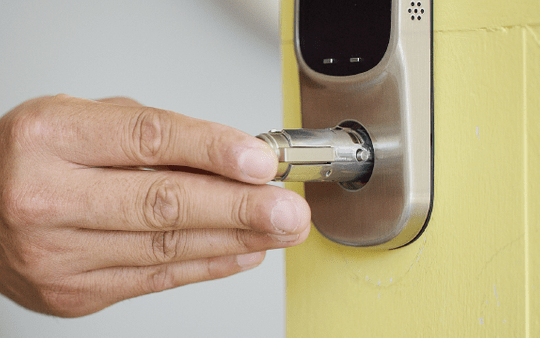
12. Insert the key-free cylinder into the handle on the exterior keypad. The bar on the cylinder should face the opposite direction of the latch.
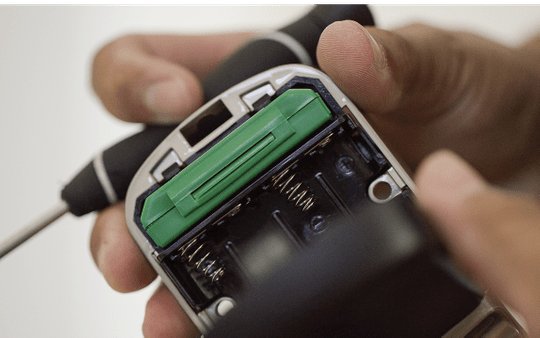
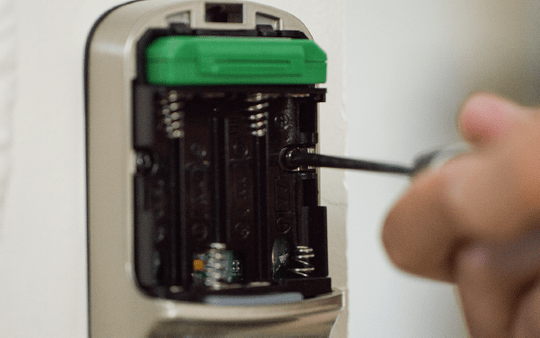
13. Insert the 4 AA batteries into the battery slot in the back of the lock. Reattach the battery cover.
14. Snap on your interior and exterior levers in the correct direction. You can test the levers and the latch bolt by turning the handles on both sides of the door.
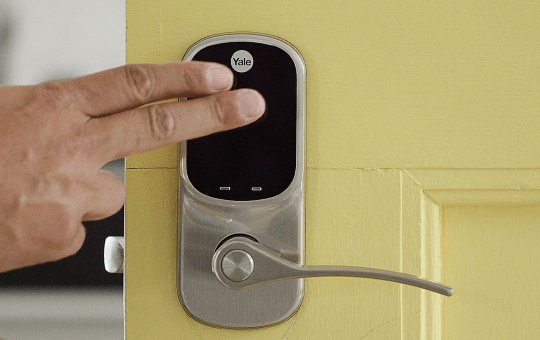
15. Power up the device by placing your hand on the keypad.
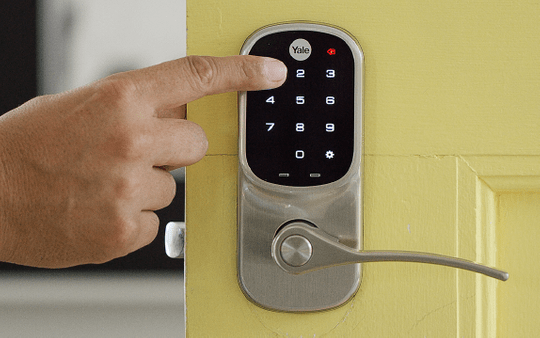
16. Set up your master code by pressing the gear icon in the bottom right of your lock keypad, followed by a 4-8 digit combination, then pressing the gear icon again. You can also set up the master code in your web account.
Creating user PIN codes
You can create up to 100 user PIN codes with your lock. You’ll need to set up your master PIN first.
To create a user code:
- Enter your master PIN, then press the gear icon
- Press 2, followed by the gear icon
- Press 1, followed by the gear icon
- Enter the user number (1-100), followed by the gear icon
- Enter a 4-8 digital user PIN, followed by the gear icon
Ways to test your door lock
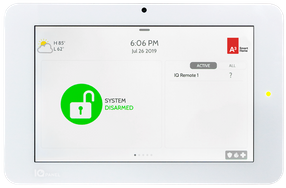
- Manually lock and unlock your door
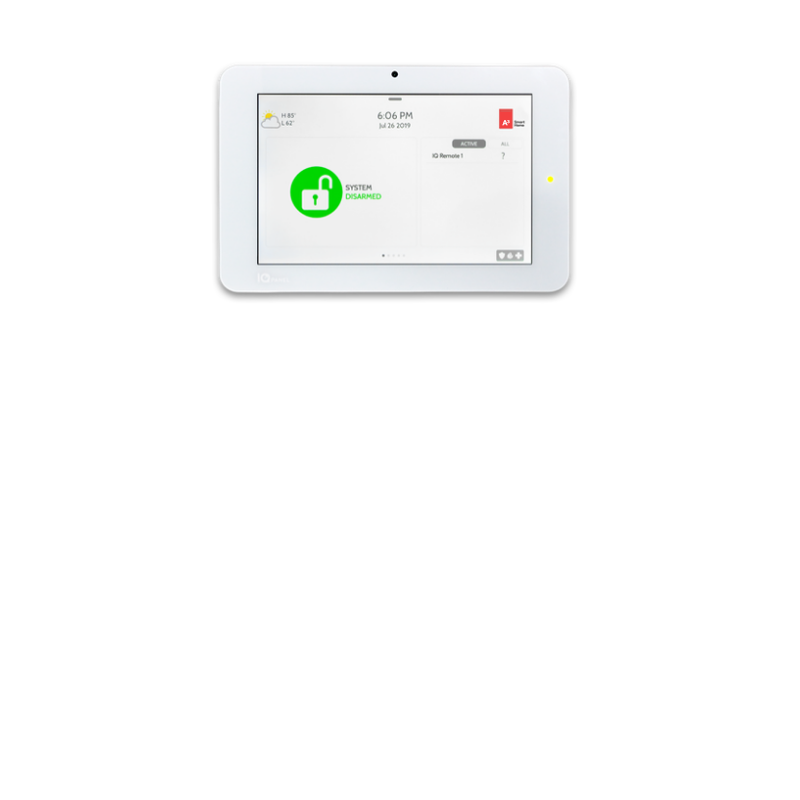
- From your control panel, slide over to the door lock window and lock or unlock remotely
- Lock and unlock from the A3 Smart Home app
Controlling your door lock
After your panel recognizes your door lock, you can customize any of the fields you’d like in the default device information.
You’ll be able to turn your door lock using your panel and mobile app.
You can also create rules based on events (e.g. lock or unlock your door when you arm/disarm your system) or a schedule in your web account.
To create an event-based rule
- Log into your web account
- Click Automation
- Click + Add New Rule
- Click Event-triggered Rule
- In the Name of rule field, enter a name for your rule
- In the Automate My field, click to select Locks
-
In When this event occurs, click to select the device that will trigger the lock rule
- Use the dropdown menus to specify the conditions of the action. If available, use the Perform this action dropdown menu to specify the time delay for lock action to be completed
- In Select Devices, click to select the devices that will follow the rule
-
In During this time frame, choose one of the following options:
- Click to select At All Times for the rule will be carried out any time of day
-
Click to select Only during the following times to determine the specific days and times the rule will be carried out
- In Day(s), click to select the days the rule will be active
- Using the Starting at dropdown menu, select the start time for this rule
- Using the Ending at dropdown menu, select the end time for this rule
- Verify the rule is configured with the correct settings
- Click Save.
To create a schedule
- Log into your web account
- Go to Automation in the main left hand menu
- Click Schedules
- Click + Add New Schedule
- Create a name for the schedule
- In Select Doors, click to select which doors will follow the schedule
- In Choose Schedule Type, select Create a custom schedule to configure a custom schedule for the rule
- Click Save.
For full capability of your door lock refer to the help guide found under the “?” Symbol in the upper right hand corner of your online account, or under Support/Help documentation found in your app menu.